
 So far I have three boys and two crazy-elaborate traditions that I do for them: Halloween costumes & birthday cakes. Which is funny because before I had kids I'd hardly ever used a sewing machine and didn't know the first thing about making cakes, elaborate or otherwise. I claim good genes - my grandma had both of these skills in spades, so even though she never sat down and taught me either one, I must've picked them up from her genetically.
 So, back to cakes. I just want to say that anyone, wait I mean ANYONE can make a cake like this. Seriously, if you played with play-doh as a child, you have skills enough for this. It's easier (and more fun) than you think. You, too can impress your family & friends (and especially the kiddos).
Step 1 - Preparing the Fondant
You will need to make your fondant a whole day before you make your cake because it has to refrigerate overnight. I like to make my kids' cakes the day before their birthdays so I'm not in the kitchen going crazy the day-of or night-before - (as I was when I did this cake) so I now make the fondant 2 days before a birthday.
Now, be aware: Marshmallow fondant is super easy to make and very tasty but also very rich. I, personally, do not like to drape my cakes in fondant because while it certainly looks gorgeous it's not as tasty as the frosting I usually make (Fannie Farmers Confectioners Frosting II) - so I compromise by using regular frosting on the cake and decorating with fondant animals. A win-win!

For my Penguin cake I knew I would need a significant amount of black & white. I also needed some yellow for beaks & feet and some blue for water.
I recommend starting with your lightest color first because the food coloring tends to stain your hands. Especially black, as you can see here. My hands were faintly black for a couple of days after this. Some colors (like yellow, light blue & green) do not take much food coloring to get a nice solid hue but others like black & red take a lot of coloring because each time you knead the color into the fondant they turn gray or pink. Persevere!


Here you can see my little balls of colored penguin fondant all wrapped up and ready for bed in the fridge.
Step 2 (the next day) - Fondant Bodies & Feet
 You'll notice I left out the step where you make your cake. I happened to use one of the Fannie Farmer Cookbook recipes for this cake (but any recipe, boxed or homemade) will work just as well. Since I wanted a snow bank and a lake, before I frosted the cake I carved out and hole in the middle of the cake, filled that in with frosting and used the carved-out cake for my hills. I made my frosting very soft & spreadable to look like snow and it later set into a nice solid frosting.
Here in the above picture you can see I have already flattened and inserted my blue fondant lake onto the cake (there is a gummy Swedish Fish poking out) and I have begun preparing my white penguin bodies and the one lone snowman. I should mention that the fondant works best when it's cold. So keep it in the fridge, only getting out the color you're currently working with.
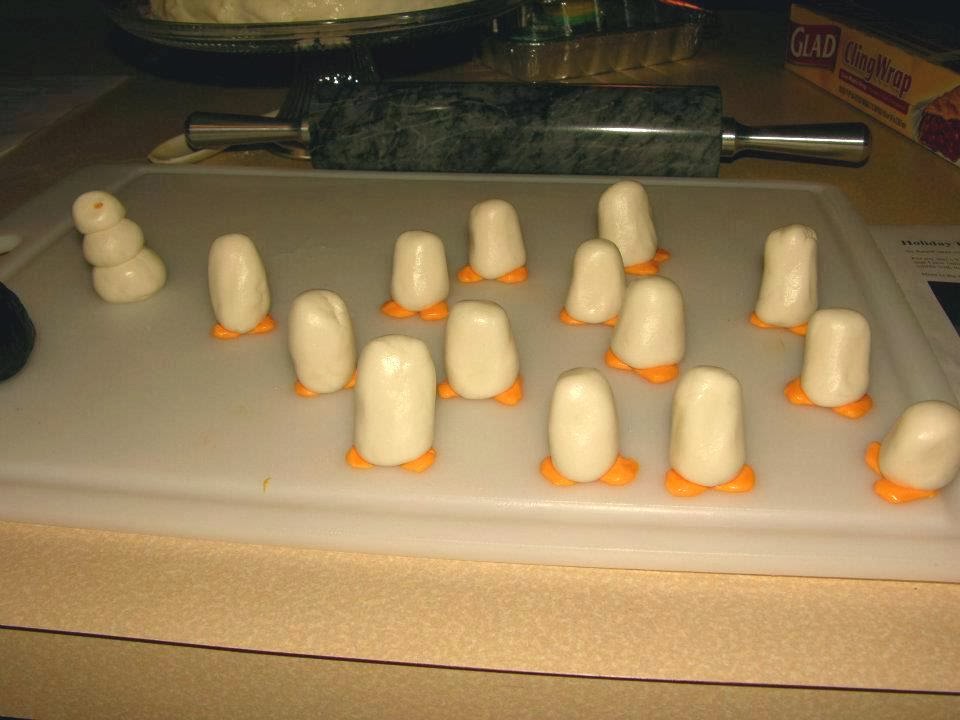
Most animals can begin with this same rounded body. In addition to penguins, I have done tigers, elephants, dogs, monkeys, lions, alligators...... For the penguins, they were going to be standing upright so I added a couple of triangle blobs of yellow fondant to the bottom of their bodies for their feet. Snowman also got a tiny stick of yellow fondant for his nose.

Step 3 - Wings, Heads & Faces
I did the penguins' backs and tails in one piece and wings in two separate pieces. First make three long, flattish pieces with a point on one end. I applied the back/tail pieces first, then the wings on either side and smoothed the fondant together at that point so it looks like one piece. Round balls of black on top for their heads.

Next I got my yellow back out and added triangles to their faces for beaks and two white balls of white for eyes. And this is where things got crazy. You'll want to put a few drops of black food coloring into a small dish and dip a toothpick into it to poke the eye spots onto their eyes.

When I made this cake it was 2am the night before the birthday (or day-of, I should say) and I was the only one awake. Putting the eye spots onto the penguins eyes gave them such funny expressions and totally brought their little characters to life. There was giggling involved. I know, I sound like a crazy person. But bringing cute fondant penguins to life at 2am will do that to a person.
Step 4 - Get creative, add them to your cake!
When I added the penguins to the cake I put some of them on their bellies so they could slide. I only needed to reposition their heads for them to look right. One penguin on the backside of the cake was stuck in a snowdrift, others were giving each other funny looks because of the direction I made their eyes look. It was a very busy cake and my penguin-lover kiddo went crazy when he saw it! You can do this!

Want some more fondant animal inspiration?? Here's a peek at some other cakes I've made with fondant:


Have fun!

No comments:
Post a Comment